Become a Backyard Explorer!
Our NBG Educators have put together activities to encourage children and families to become field biologists while exploring nature in their backyard, from a patio or deck, or by simply looking out a window.
In addition to this page, we have created a resource page for homeschool families. Click here to access our homeschool page. For additional activities to complete at home, we also encourage you to join our Facebook page at NBG Youth & Family Programs! We can also be reached by email at youthed@nbgs.org.
Backyard Nature Scavenger Hunt
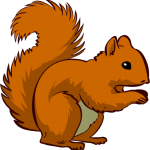 Click here or click on the squirrel to download, save, and/or print a copy of our Backyard Nature Scavenger Hunt!
Seek App by iNaturalist: While out looking for the listed items in your backyard, we encourage you to download the Seek App by iNaturalist. This fun and exciting app assists you in identifying the plants and animals around you. We also encourage you take photos of the nature you find in your backyard, and tag #wowbackyardexplorer and #nbgblooms on social media.
Additional Activity:
Write down (document) all the plants and animals you identify in your backyard, and then research your findings in an old notebook or binder. This is the beginning of your nature journal. As we post additional activities in the coming weeks, we will encourage the ongoing use (or creation) of a nature journal for the completion of our nature and science-based programs.
Tree-mendous Trees
This week’s activities are all about trees! Trees have many benefits in our daily lives. They look nice and provide shade, but trees also improve our air quality, provide habitats for wildlife, and reduce noise pollution. Complete the following activities to learn about trees and to interact with the trees in your backyard.
Anatomy of a Tree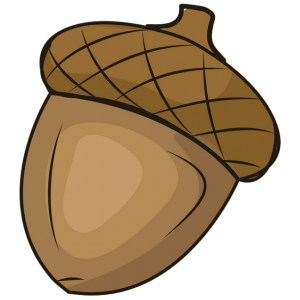
Click here or on the acorn to download, save, and/or print a copy of our Anatomy of a Tree worksheet.
Tree Observations (4 Week Project)
Every good field biologist knows the importance of observing nature, and documenting any changes over time. Now that it is spring, we want you to study the changes a tree makes over the next four weeks. If you have not yet started your nature journal, now is the perfect time! You can use an old notebook, sketch book, or loose leaf paper in a binder. Make sure to personalize your nature journal – decorate it with stickers, markers, and other items.
To start this project, you will first need to pick a tree. It can be a tree in your yard, in your neighborhood, or one you can simply see from a window. Draw a picture of the tree, and write a description of it in your nature journal.
Some questions to think about when describing your tree: Are there any leaves on the tree yet? What do the leaves look like? Any flowers? Describe how the bark and branches look. Describe the size of the tree. Does the tree get a lot of visits from wildlife? Lastly, write a prediction of what you think the tree will look like in four weeks.
Once a week, you will continue to draw pictures of your tree, and add a description of what you see, and how the tree has changed from the previous entry. After 4 weeks, describe how did the tree has changed over the project time period. How is it different from the first entry? How has it stayed the same? Were your predictions correct?
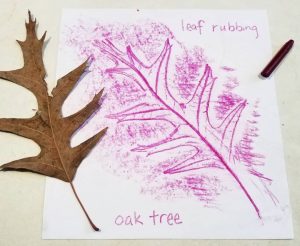 Leaf Rubbings
Add a leaf rubbing to your nature journal! For this project you need to gather a few leaves. Try to only find leaves already on the ground. Ask an adult to help you take one or two leaves off of a tree if needed. You will also need your nature journal or blank paper, and crayons with the paper removed. This activity is great if you have worn down or broken crayons laying around!
Directions:
- Set the leaf on a smooth surface with the vein side facing up. If using your nature journal, you will need to place the leaf behind the sheet of paper you will color on.
- Cover the leaf with a piece of paper or behind the journal page you will color on.
- Rub a crayon sideways back and forth across the paper covering the leaf. Make sure to hold the paper still so the leaf does not move.
- Watch as image of the leaf begins to appear on the paper!
Backyard Birds
Learn how to study bird behaviors and identity backyard birds by completing the following activities:
Backyard B ird BINGO

Click here or on the blue jay to download, save, and/or print a copy of our Backyard Birds BINGO card.
Project FeederWatch
Interested in contributing to scientific research? Click here to access Project FeederWatch, a Citizen Science-based project that allows participants help to monitor backyard feeder birds.
Celebrate Urban Birds
Click here to join the Celebrate Urban Birds Citizen Science project, and to access additional bird-related activities.
Make you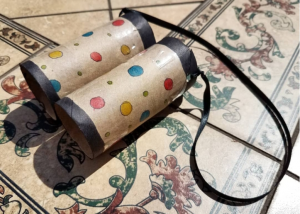 r own Backyard Binoculars
To get a better look at the birds in your backyard, make your own pair of binoculars!
Materials:
- 2 toilet paper tubes– empty rolls only.
- Glue or scotch tape
- Scissors
- String or yarn
- Markers
- Hole puncher
- Optional: Nature journal and writing utensil
Directions:
- Color the toilet paper tubes with markers.
- Glue or tape the two toilet paper rolls together.
- Punch one hole at the top of each side of the toilet paper rolls. Tie the yarn/string through each hole. You could also glue the yarn/string onto each side if you do not have a hole puncher.
- Nature Journal Activity: Document the birds you see in your backyard through your binoculars in your nature journal. How many different types of birds did you see? Were you able to identify them – what were they? What were the birds you saw doing? You can reference the Backyard Birds BINGO card to identify the different behaviors.
Don’t forget to write an entry in your nature journals with your tree observations!
 Earth Day Celebration!
On April 22, 2020 we will celebrate the 50th anniversary of Earth Day! To encourage a “greener” lifestyle at home, families can complete the following activities and upcycling projects. Make sure to check out the NBG Youth & Family Programs Facebook page to access additional Earth Day-themed content and activities!
Click on the world graphic to learn about the ways Norfolk Botanical Garden is a leading the way in environmental stewardship and sustainability!
Recycle Relay
The Recycle Relay is a fun way to teach your kids how to recycle, and gets them thinking about creative ways to reduce and reuse items around the house! For a reference to items that can/cannot be recycled based on the city you live in, click here!
Materials:
- Different kinds of trash.
- 8 Buckets/bins.
- Open space (yard, deck, or patio).
Directions:
- Collect different kinds of trash including recyclable materials, reusable materials, and items that would have to be thrown away. Try to avoid any food waste, as this may create an unwanted mess.
- Get two buckets of bins and fill them each with a mixture of all three different kinds of trash.
- Place the two bins a few feet apart on one side of the yard.
- At the other end, place three bins on each side (six total) that are labeled, Recycle, Reuse, and Trash. You can do this with groups or one on one.
- Direct the kids to look through the bin and decide which items can be reused, recycled, or thrown away, and then they run each item to the correct bin.
- Whoever or whichever team finishes first, wins!
- After both buckets are completed sorted, parents can look through the items with the kids. Have the kids explain why they put each item in each bin. Parents should discuss with their children why certain items should be reused, recycled, or thrown away. This is also a good time to explain how improper recycling can cause all of the recycling to be thrown out. For reference
Compost In A Bottle
This activity teaches kids about the benefits of composting, and as a bonus, will produce some great, nutrient-rich soil for your garden!
Materials: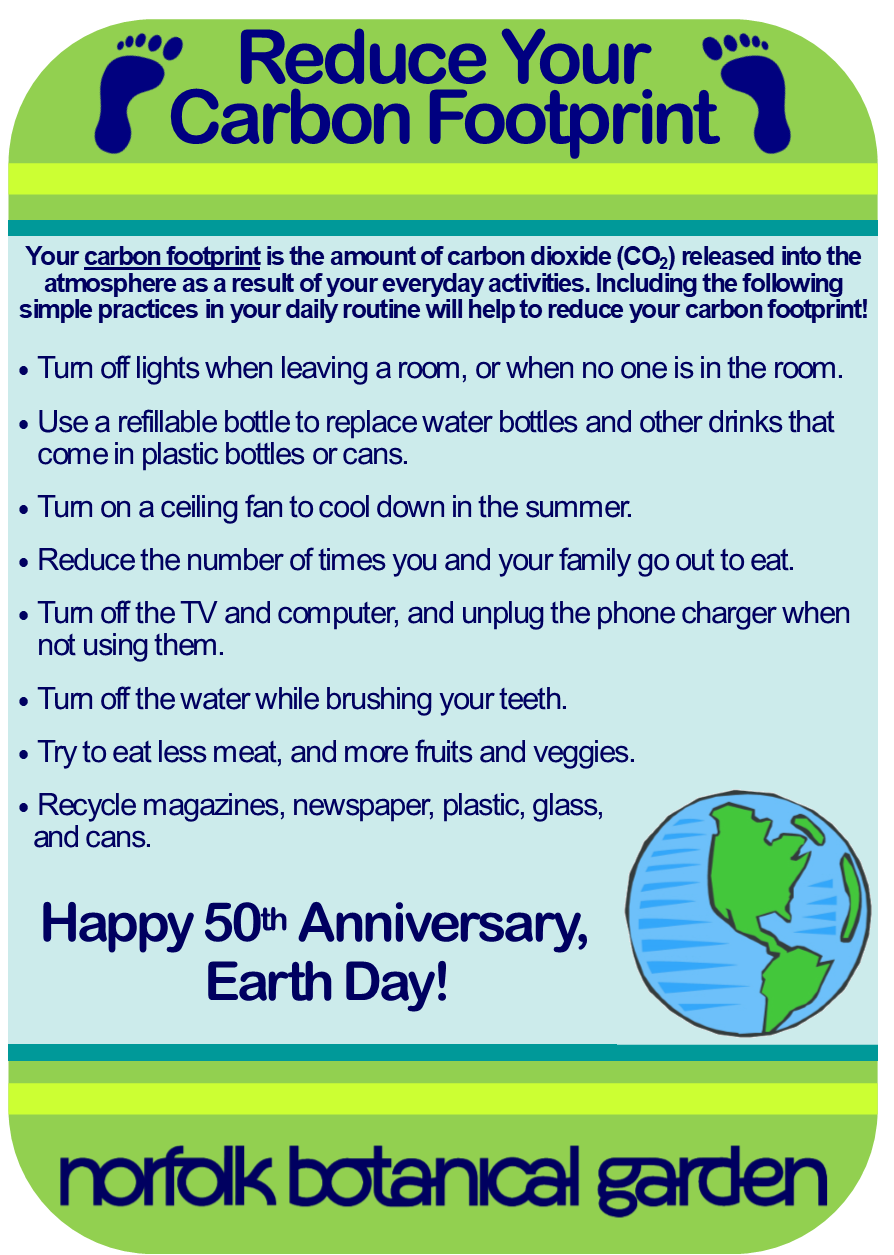
- Clear 2-liter soda bottle with lid.
- Scissors.
- Permanent Marker.
- Water.
- Grass clippings, hedge clippings, and leaves.
- Fruit and vegetable peelings (no citrus or onion).
- Shredded paper (no glossy paper).
Directions:
- Cut the top of the bottle of the two liter bottle off to form a wider neck hole.
- Add a layer of garden soil about 1 ½ inches deep.
- Add a layer of fruit or vegetable peelings like potato, carrot, or apple.
- Repeat steps 1 and 2.
- Add another layer of garden soil.
- Add a layer of shredded paper then add another layer of soil on top.
- Add a layer of grass clippings or leaves.
- Repeat the paper, soil, and clippings/leaves layers until the bottle is full.
- Use a spray bottle and dampen the layers with water.
- Use tape to reattach the top of the bottle. Make sure the top is secure and air-tight.
- Use the permanent marker to draw a line where the top of the layers are so you can see the changes over time.
- Leave the bottle in a sunny place. In about 3 – 6 weeks, you should see big changes in your bottle. Most of the layers should be decomposed into a nutrient-rich soil for your garden!
Upcycled Art: Toilet Paper Tube Flowers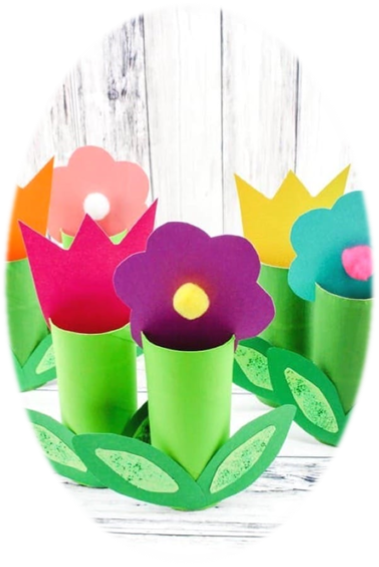
Make your own spring garden using recycled materials!
Materials:
- Toilet paper tubes (one per tulip).
- Construction paper (green and several bright colors for the flowers).
- A stapler.
- Scissors.
- Glue – stick or liquid.
- Optional: other decorating materials – rhinestones, glitter, stickers, markers, etc.
Directions:
- Cut the green construction paper to cover the toilet paper tube. Staple the paper to attach it to the tube. If you want to skip this step, you can use markers to color the tube instead! Make sure to save some green construction paper for the leaves.
- Cut a small (half inch) incision on each side of the top of the toilet paper roll. After you cut the flower shapes, they will sit in the incisions.
- Using the colorful construction paper, cut out flower shapes. Insert the flower shapes into the incisions at the top of the toilet paper tube – one flower per tube.
- Cut out leaves using the green construction paper. Use glue to attach the leaves to the tube.
- Use additional decorating materials to personalize your upcycled garden!
Don’t forget to add another tree observation (week 3) to your nature journal!
April Showers Bring May Flowers
As the phrase suggests, some of the most beautiful and colorful flowers come after the rains of early spring. To celebrate May flowers, complete the following activities:
April Showers Bring May Flowers Worksheet
 Click here or on the flower to download, save, and/or print a copy of our April Showers Bring May Flowers worksheet.
First, you can practice labeling the parts of a plant (don’t forget to color the plant), and then complete the spring word search!
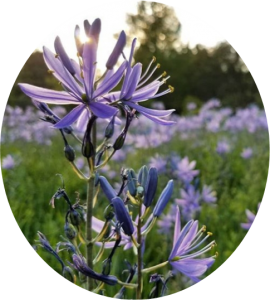
Budburst For Families
Click here or on the flower photo to access the Budburst For Families website for themed projects and activities. Completing these activities will also assist in providing scientific research for the Budburst Citizen Science project!
Spring Flower Sketching
In your nature journal (that you really should make!), practice your botanical sketching by drawing flowers and other plants you can see in your backyard, or from a deck, porch, or window. If you don’t have a great selection of plants to see from your house, look up spring flowers online!
Make a Rain Stick
A rain stick is a long, tube-like instrument that makes a sound like rain falling when it is turned over and over.
Materials:
- An empty paper towel roll.
- A piece of aluminum foil.
- A piece of plastic wrap.
- Popcorn kernels, dry beans, or dry rice.
- Tape.
- Markers, stickers, and other decorative materials.
Directions:
- Use markers to decorate the paper towel tube. You will go back later to finalize decorating the rain stick once you finish constructing it!
- Crumple up a long, thin piece of aluminum foil and insert it into the paper towel tube. The aluminum foil will act as the barrier to keep the beans, rice, or popcorn kernels moving through the tube at a slow rate, making the rainfall sound.
- Put a doubled-up piece of plastic wrap over one end of the paper towel tube, and tape in place.
- Pour a tablespoon of dry beans or popcorn kernels into the open end of the tube, then seal the end with a doubled-up piece of plastic wrap. Tape plastic wrap in place.
- Finalize decorating the tube as desired with markers, stickers, yarn, adhesive gems, beads, and any other fun craft supplies you have on hand!.
- Tip back and forth to hear the sweet sound of rainfall!
Don’t forget to complete the last entry of tree observations in your nature journal! How did the tree you selected change over the four week period?
The Water Cycle
Explore the process and purpose of the water cycle through online activities provided by Project Wet, and watch our “how-to” video to learn how to construct your own water cycle model!
Project Wet: The Water Cycle
Click here or on the Project Wet logo to access the The Blue Traveler game to learn the ins and outs of the water cycle process.
DIY Water Cycle Model
All living things need water, so it’s important to keep natural water sources like rivers, lakes, and oceans clean of pollution. Some forms of pollution are easy to see, such as trash or oil. Even dirt can be considered pollution if too much gets into the water supply and turns the water muddy. Other forms of pollution, like chemicals, might require scientific tests to find.
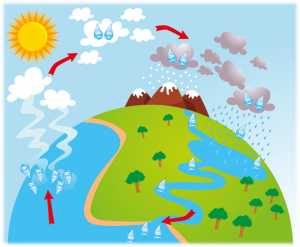 Nature has different ways of helping keep the planet’s water clean from pollutants. The water cycle uses heat from the sun to take water from the surface of the Earth up into the air in the form of tiny droplets (evaporation). These droplets are so small that many visible forms of pollution are left behind. When the droplets cool, they condense into clouds, fall back to Earth as precipitation, and recollect in lakes, rivers, oceans, an other bodies of water to start the process again.
Learn how to replicate the water cycle with this science activity! Click here or on the water cycle diagram to access the “how-to” video and material list.
Awesome Ants!
This week will be studying the tiny, complex world of ants.
Ant  Observations
Become an ant detective ant! Click here or on the ant to save, download, or print a copy of our Ant Observations worksheet.
Nat Geo Kids: Awesome Animals – Antzilla
Click here to access a short documentary on the awesome world of ants!
Egg Carton Ants
As we continue our series of upcycled crafts, complete the following steps to make your own army of ants out of egg cartons and other simple craft supplies!
Materials:
- Cardboard egg carton – three attached cups.
- Yellow, brown, red, or black paint or markers. Or use other colors if you want to make a more creative ant!
- Paint brush.
- 4 pipe cleaners – three for legs and one for the antenna
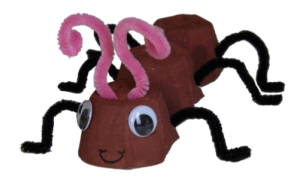
- Googly eyes (optional).
- Glue (optional).
Directions:
Note: An adult should assist with all steps requiring scissors.
- Cut a strip of three cups from the egg carton.
- Using the scissors, poke two holes in the top of the first cup. These will be for the antenna.
- Next, poke three holes on each side of the second two cups (six total holes). The holes should be equally spaced out. These will be for the legs.
- Use paint on markers to complete color the cups. Let the cups sit to dry before starting the next steps.
- To add the antenna, fold one pipe cleaner in half. Feed each end through the holes you made in the top of the first cup. You can twirl the ends around your finger to make them curly.
- To add the legs, push a pipe cleaner through the first hole you made in the side of the first in the first cup. Feed it through to the first hole on the other side of the cup. Follow this same step for the second and third row of holes for the next two sets of legs – ants are insects, they have six legs! Fold up the end of each pipe cleaner to create a foot.
- Glue the googly eyes onto the front of the first cup. You can also use a marker to draw eyes.
- Use a marker to add a mouth to your ant.